Honey Soy glazed Pumpkin & Beetroot Quinoa w/ Avocado & Hummus

Hello everyone!! I know I have been MIA for AGES, but no fear! I’m back with a kickass recipe for you 😉 BEHOLD.

IMG_9378Sweet, sticky ruby GOODNESS. 

How do you make this beautiful thing right here? Firstly, you start off with a good bedding of Quinoa (read about its multiple benefits here!) Then, you GLAZE beautiful cubes of ruby red beetroot and pumpkin with honey soy till thick and yummy. Add it to your bed of quinoa with the life essentials: Avocado & Hummus. There you have it. Simple. Delicious. Good for you food. Enjoy this one!

 Honey Soy glazed Pumpkin & Beetroot Quinoa
w/ Avocado & Hummus
IMG_9375

Ingredients (Makes enough for 2):

  • 1 cup uncooked quinoa
  • 1 big beetroot, cubed
  • 1/2 pumpkin, cubed
  • 3 tablespoons light soy sauce
  • 1 tablespoon honey
  • 1 tsp sesame oil
  • 1 tablespoon olive oil
  • 1 avocado
  • 1/2 hummus (or more, cause you know you want more)

Method

1) Firstly, boil 1 & 1/2 cups of water and add your quinoa. Give it a good stir and cover to simmer for around 15 minutes, or till all the water has been absorbed, then turn off the heat and leave quinoa to sit and cool for a while.
2) Make your honey soy glaze by combining the soy sauce, honey and sesame oil.
3) Heat a pan with the olive oil and start sautéing your pumpkin. After about 5 minutes, add the beetroot cubes and continue to cook till slightly soft (around 10-15 minutes) Once the pumpkin and beetroot are a bit soft, add your honey soy glaze and let the beautiful veggies bathe is all that honey soy glory till thick and gooey. Turn off heat when done.
4) Simply slice your avocado lengthwise and twist to make two halves. Remove the seed using a knife and peel the avocado halves. Cut avocado into cubes.
5) Time to plate! Divide your quinoa between two plates and add your pumpkin & beetroot cubes on top. Finish with a sprinkling of your avocado cubes and a nice big slab of hummus. There you have it!

Clean Balsamic Mushroom Salad

1081063_10201024762812942_681625386_nDo you like mushrooms? Well I do and this salad is perfect for those cute little button mushrooms you have at home. Even if you hate mushrooms, you’ll love’em after trying this, I assure you 😉

1081309_10201024762012922_858617841_n

1075241_10201024338762341_1760787706_nThis is actually so so easy and so delicious! Baby spinach, button mushrooms, balsamic vinegar, crumbled feta. Such a good combination that is full of flavour! I added some sliced roasted almonds after taking these photos and they added such a nice crunch. Feel free to use pinenuts, walnuts or anything you prefer.

Have this for lunch, for dinner, as a snack, whatever. Just make it.

Clean Balsamic Mushroom Salad1081935_10201024796013772_1325122791_n
Ingredients:

  • 8 button mushrooms, quartered
  • A little olive oil for frying
  • 2 tablespoons balsamic vinegar
  • 2 tablespoons olive oil
  • A handful of baby spinach leaves
  • Some feta, crumbled
  • A sprinkle of roasted sliced almonds (Or any other nut you prefer)

Method

1) Heat a pan and add a little olive oil. When the pan is hot, add your quartered mushrooms and sauté until cooked through.
2) In a bowl, combine the balsamic vinegar and olive oil. Add your cooked mushrooms into the balsamic mixture and toss throughly.
3) On a plate, add the baby spinach and pour your balsamic mushrooms on. Crumble your feta on top and sprinkle the roasted sliced almonds. Voila! So simple and so good.

Cupcakes galore!

1082793_10200920158757906_649547103_n
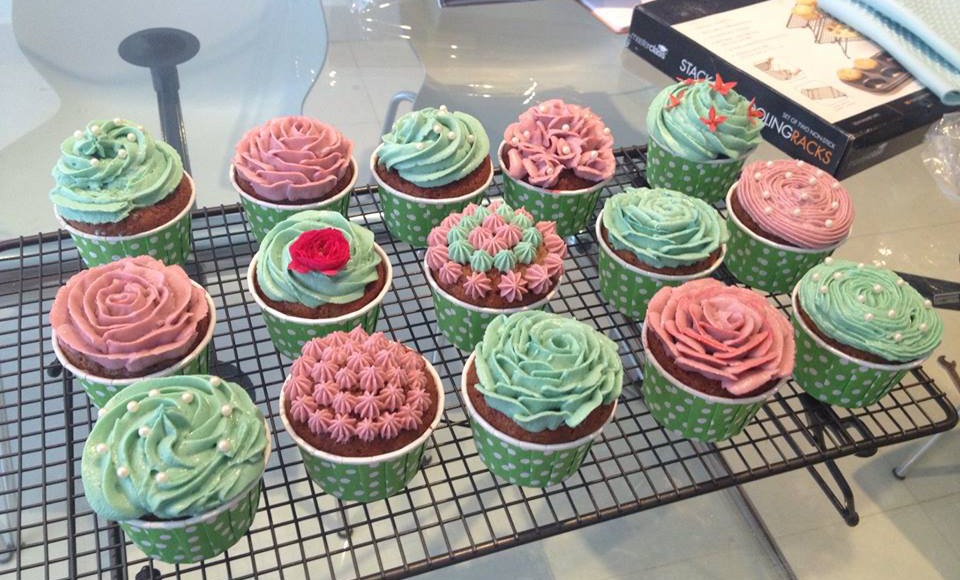
Cupcakessss! My friend and I baked up some lovely cupcakes the other day and decorated them so intricately and beautifully that they almost look store bought! I brought them home in a box and people were asking me: Where did you get these? They look so pretty! Are they from 12 cupcakes(Cupcake shop in Singapore)?
912457_10200920119916935_172827761_n
So I thought I’d share some photos of these beauties today! They are honestly too pretty to eat….

1081717_10200920128997162_1953823552_n

These are Apple Sauce cupcakes with a cream cheese frosting(We made up two colours: Dusty pink & Teal, which turned out so pretty!) , such a great combination! They were moist and so yummy! The recipe is courtesy of my friend, who loves pretty things, hence we decided to make a cupcake decorating sesh. It was so rewarding producing our creations.

1082479_10200920174718305_1793471533_nWhilst my friend was a real pro at the rose looking ones, I did all the others and even went outside to pick a few flowers to ‘dress’ these babies. You should totally bake up some cupcakes and take the time to decorate them nicely, so you can bring them around and people will ask you: Where’dya get them from? And you’ll be like: haha i made them. What a great day!

No-bake Vegan Key Lime Pie!

1062778_10200867419999470_2141323257_n  1059383_10200867425599610_904223222_n
To be honest, i had never tried key lime pie until today.. Sad i know, but the truth. Now i absolutely LOVE it. You know i’m a super big fan of Blogilates’ Cheap Clean Eats and after seeing this recipe for a NO-BAKE, VEGAN KEY LIME PIE, do you think i could resist not making it? I adapted it a bit hehe, this is seriously SO simple.

And it certainly did not disappoint.

1062287_10200867430119723_228034325_n

1062719_10200867415399355_1753835101_n

It has the perfect balance of tanginess to sweetness and a subtle yet refreshing lime flavour. The base of the pie is super easy (in fact the whole pie is, easy…) You basically just blend up some dates & your choice of nuts and press it into a pie pan. I mean how easy is that?!

1057484_10200865973243302_1858983538_n

The Lime filling? Just as easy. Blend avocados, lime zest & juice, honey & some tapioca flour to thicken. The colour of the filling is completely natural and does not use any permitted colourings/flavourings! Purely avocados & limes. Natural ingredients duhh. God i love you avocado(It’s perfectly fine to confess ones love for a beautiful fruit). You don’t even need to feel guilty, so make it 🙂

No-bake Vegan Key Lime Pie

adapted from Blogilates’ Cheap Clean Eats

992389_10200867427639661_1536420141_n

Ingredients (Makes 1 pie)

Base:

  • 3/4 cup nuts of your choice (I used a mixture of macadamias & almonds)
  • 6 medjool dates

Filling:

  • 2 avocados worth of flesh
  • 3 limes, zested & juiced (Depends how big your limes are, if really big, use 2)
  • 3 tablespoons honey
  • 2 tablespoons tapioca flour (To thicken, but optional)

Method

1) For the base, blend up the dates & nuts in a food processor till crumbs form and firmly press this mixture into the bottom of a pie pan. Set aside while you make the filling.
2) To make your filling, blend your avocado flesh, lime zest & juice, honey & tapioca flour till smooth. Taste to adjust the ratio of lime juice to honey. I liked a lot of the refreshing lime flavour so i added more zest & juice, it’s completely up to you!
3) Spread your filling on top of your base and chill in a freezer for at least an hour. Afterwards, take it out, slice it up & garnish with some lime slices!

Apple Nachos

1057954_10200861525652115_1850752889_nCraving a quick to make snack/dessert? I can’t even tell you how simple these Apple Nachos are to make… You literally slice up an apple, and sprinkle on ANYTHING you like. I topped mine with cinnamon, yoghurt, honey, blueberries, sliced almonds & some muesli 🙂 It’s the perfect snack and it tastes so good (and not to mention so nutritious). There is no reason to snack on junk food now!

Apple Nachos

Ingredients

  • 1 apple, sliced
  • 1 small handful muesli or granola
  • 1 tablespoon yoghurt
  • 1 small handful blueberries
  • A drizzle of honey
  • 1 teaspoon cinnamon (Or more if you love cinnamon)
  • 1 small handful sliced almonds

Method

1) Place apple slices on a plate and top with the rest of the ingredients! Drizzle that honey and yoghurt, sprinkle that muesli, cinnamon, almonds, blueberries and you’re good to go!

Simply Cinnamon Rolls (from scratch!)

1056961_10200823679665989_1455749560_n979510_10200823383498585_2090287855_n

It’s good to indulge sometimes, yolo. I made these yummy cinnamon rolls from scratch a week ago using this recipe along with a few modifications 🙂 Turned out great! I just love cinnamon rolls oh my goodness. Your kitchen will smell of cinnamon goodness when you make these!

1060547_10200823147012673_302793247_nThe dough is really simple to make and when i call these simple, i mean these rolls only require ONE RISE. WHAT?! 

1057875_10200823136212403_1950804246_n
After making your dough, you roll it out and sprinkle with a THICK layer of cinnamon sugar (The more the better!) Tightly roll it up like a rolly polly and cut into slices. (I managed to make 15 with this recipe.)

Your rolls will look super small at first but leave the rolls to rise for 60-90 mins and they double in size! Here’s what i did: I preheated my oven to 200F, turned off the oven and placed the rolls in the oven to rise up!

1060650_10200823292496310_1455387949_n

1063605_10200823281456034_1755462668_n

1062029_10200823291976297_1623514886_n
Look how fluffy they turned up! And they stay that way even after baking 😉

 1056961_10200823679665989_1455749560_n

I covered my rolls after 15 mins in the oven to prevent further browning, but now i wish i covered them 10 mins in since they look a bit too brown :p Use your instincts.

Now they’re ready for some glaze! I made a simple glaze of icing sugar and milk.
967704_10200823367978197_2024410232_n

1057845_10200823371658289_1863126186_n

Glaze up! This is truly the softest, fluffiest cinnamon roll recipe you will ever find!

Simple Cinnamon Rolls

from Sally’s Baking Addiction
1059314_10200823385418633_1677744761_n

Ingredients

Rolls:

  • 2 and 1/3 cup all purpose flour
  •  3 tablespoons sugar
  • 1 teaspoon salt
  • 2 and 1/4 teaspoons yeast
  • 1/2 cup water
  • 1/4 cup milk
  • 2 and 1/2 tablespoons butter
  • 1 egg

Filling:

  • 1 and 1/2 tablespoons softened butter
  • 1 and 1/2 tablespoons ground cinnamon
  • 1 and 1/2 tablespoons sugar

Glaze:

  • 1/4 cup icing sugar
  • 1 teaspoon milk

Method

1) To make the dough, combine the flour, sugar, salt & yeast together.
2) Heat the water, milk & butter together in the microwave or on the stove till the butter has melted and the mixture is hot to touch. Add the butter mixture and the egg to the flour mixture and mix to form an elastic soft dough (Add more flour if its too wet)
3) Lightly flour a smooth surface and knead the dough for a solid 5-6 minutes. Set aside in a lightly greased bowl for 10 minutes to rest ( note that the dough won’t rise yet).
4) After 10 minutes, roll the dough out into a rectangle which is not too thin, neither too thick and spread with the softened butter. Mix together the cinnamon and sugar and sprinkle this mixture all over your rolled out dough.
5) Tightly roll up and cut the length of dough thickly to get your cinnamon rolls. Place in a light greased dish. Cover the dish with some foil and let the dough rise in a warm place for 60-90 minutes. I preheated my oven to 90°C, turned it off and placed my rolls inside to rise. Works really well.
6) After the rolls have doubled in size, you’re ready to bake them! Preheat your oven to 190°C and bake the rolls for 20-25 minutes( I suggest covering the rolls with some foil after 10 minutes to prevent over browning)
7) For the glaze, combine the icing sugar and the milk to get a thick mixture and simply drizzle onto your rolls! Yum.

Beautiful Bangkok

Hihi! As you’ve noticed, i haven’t really been blogging for the past few days as i have been in Bangkok 🙂 The shopping was amazing and the food – even better. Thai food, oh my.

1062643_10200855597543916_925961613_nI highly suggest you visit this beautiful thai city if you haven’t already, the food is absolutely divine. (May be biased as i love thai food) But really, Phad Thai, Mango Sticky Rice, Tom Yum Soup, Red Ruby, Beef Noodles, I could go on and on.

I also visited the famous floating market, indigenous to the villages in Bangkok and i absolutely loved it! We were taken via speed boat across long stretches of canals and finally reached the floating market, after stopping several times at a few souvenir shops.

1057744_10200849890881253_1803697365_n

1061037_10200849861560520_789802179_n

We were abruptly surrounded by dozens of floating little sampans (small boats) selling all sorts of goodies – Coconut pancakes, fruits, mango sticky rice, pork noodles. It was absolutely crazy. Definitely worth going!

1058506_10200849848760200_1585751038_n
These coconut pancakes were so good – crispy on the outside and soft and chewy on the inside!

1056647_10200842690781255_1881745436_n

As well as that, we visited the famous Wat Arun( A tall buddhist temple) and the Wat Pho(Temple of the reclining buddha)

1060694_10200842693701328_858745157_n

Climbed up this super steep temple!

1060639_10200842702821556_1797767467_nMum and I at the top with the beautiful scenery of Bangkok!

1063020_10200843867330668_1413222032_nAt Wat Pho Temple after observing the wonderful Reclining Buddha!

Absolutely amazing trip. Bangkok is so worth going.

Skinny Summer Raspberry Banana Smoothie

1058756_10200818121407036_1970136852_n    1058402_10200818117326934_1792147021_n
Summer has never been better! I spent my day just chilling by the poolside with this super thick smoothie and gosh was it amazing. Remember that super healthy and super easy banana soft serve? Well i found myself yearning for some really fruity, really thick and really refreshing drink to tamper the summer heat and voila!
1060875_10200818116766920_1671464965_n

1060117_10200818124807121_143067600_n
The banana soft serve which consists literally of blending up frozen bananas to give you an amazing creamy whip is the base for this fruity smoothie/milkshake. I make it all the time!1062655_10200746693741389_1446377118_n
So, i blended up that frozen banana to make this amazing creamy soft serve and added frozen raspberries and a little milk. OMG. Best.thing.ever.

967523_10200818119846997_682425173_n

Raspberries are one of my favourite due to it’s distinct flavour compared to the rest of its berry family members so you should definitely try this out! I would daresay that these taste almost like those drive through fruity milkshakes you get (with 10x less calories may i add?) but it’s made purely of fruit! How amazing!

3 ingredients, 1 whiz in the food processor, and you’re all set for summer!

Skinny Summer Raspberry Banana Smoothie1059594_10200818116006901_1116764883_n (1)
Ingredients

  • 1 frozen banana
  • 5 frozen raspberries & and a few more to garnish and make them look all pretty!
  • 4 tablespoons milk/almond milk

Method

1) Blend the frozen banana and the milk together until thick creamy and smooth, just like this easy banana soft serve.
2) Add the raspberries and continue to blend till nice and thick. If you’re not so much of a thick milkshake person, go ahead and add some ice cubes to thin them a bit, that’s perfectly fine.
3) Pour into a lovely glass and sip away!

Garlic Lover

Tomatoes and oregano make it Italian; wine and tarragon make it French. Sour cream makes it Russian; lemon and cinnamon make it Greek. Soy sauce makes it Chinese; garlic makes it good. – Alice May Brock

Ahh how i love my garlic! Anybody else adore this vampire detractor as much as i do?

Flourless Zucchini Brownies

1062306_10200807511181787_806978632_n    1062807_10200807508021708_847124825_n
I’ve recently been doing a lot of research on the Paleo Diet, which stands for eating what our hunter-gatherer ancestors (cavemen..) used to eat. Basically fresh meat, fish, seafood, fruit, vegetables and nuts. Minus all that horrible processed crap that exists in many of the foods we consume today.

In the midst of all that exploring, i came across this recipe for Flourless Zucchini Brownies and the baking obsession in me obviously had to give it a go. And boy am i glad. I can’t even describe to you how decadently moist and rich these brownies are.

979670_10200807512621823_814709569_n

I’m honestly not much of a brownie person but i swear, from this day onwards, i am only ever going to eat these because of how guiltless they are. Totally gluten free, butter free & refined sugar free, and you’re wondering how?!

1059400_10200807394898880_1745787911_nGrated zucchini and almond butter is the answer!

1056690_10200807504101610_777613829_n

I changed up the recipe slightly by adding some cocoa powder and milk to make them more moist and chocolatey 😉 The recipe calls for some cinnamon and nutmeg too which adds such a wonderful spice to these brownies, they are genuinely fab. I promise you you won’t be disappointed. Now go go go!

Flourless Zucchini Brownies

Adapted from delighted momma
1062306_10200807511181787_806978632_n

Ingredients

  • 1 cup almond butter (learn how to make your own here! So much cheaper and better for you)
  • 1 & 1/4 cup grated zucchini
  • 1/3 cup honey
  • 1 egg
  • 1 tablespoon milk/almond milk
  • 1/3 cup cocoa powder
  • 1 teaspoon vanilla
  • 1 teaspoon baking soda
  • 1 teaspoon cinnamon
  • 1/2 teaspoon nutmeg
  • 1/2 cup dark chocolate chips

Method

1) Preheat oven to 170°C.
2) Place all ingredients in a large mixing bowl and whisk everything together.
3) Pour into a greased baking pan (Not too big, you want them nice and thick).
4) Bake in the oven for 20-30 minutes, or until a toothpick comes out clean. Cut into squares and enjoy!